2011-12-05
키보드 사라지게 하는 방법
사용자 키보드 나타나게 하는 방법
-(void)textFieldShouldBeginEditing:(UITextField*)textField {
[textField resignFirstResponder];
UIView *view = [[[UIApplication sharedApplication] keyWindow] performSelector:@selector(firstResponder)];
[view resignFirstResponder];
Organizer에서 UICatalog source를 참고해서 작성
작성에 앞서서 storyboard에서 UITextField를 두개 만들고 IBOutlet과 연결하도록 한다.
custom keyboard를 위해서 UIView도 하나 만들어 두도록 한다.
#import <UIKit/UIKit.h>
@interface ViewController : UIViewController <UITextViewDelegate> {
IBOutlet UITextField *testText; //text에 대한 outlet
IBOutlet UITextField *test2Text;
IBOutlet UIView* customKeyboard;
}@property (nonatomic, retain) IBOutlet UITextField *testText;
@property (nonatomic, retain) IBOutlet UITextField *test2Text;
ViewController.m
#import "ViewController.h"
@implementation ViewController
@synthesize tesText, test2Text;
#pragma mark UITableViewDataSource
- (void)viewDidLoad {
[super viewDidLoad];
self.testText;
self.test2Text;
#pragma mark -
#pragma mark UITextFieldDelegate
- (BOOL)textFieldShouldReturn:(UITextField *)textField
{
// the user pressed the "Done" button, so dismiss the keyboard
[textField resignFirstResponder];
return YES;
}
#pragma mark -
#pragma mark Text Fields
- (UITextField *)testText
{
// if (testText == nil)
{
testText.keyboardType = UIKeyboardTypeDefault; // use the default type input method (entire keyboard)
testText.autocorrectionType = UITextAutocorrectionTypeNo; // no auto correction support
testText.returnKeyType = UIReturnKeyDone;
//testText.clearButtonMode = UITextFieldViewModeWhileEditing; // has a clear 'x' button to the right
//testText.tag = @"viewkey"; // tag this control so we can remove it later for recycled cells
testText.delegate = self; // let us be the delegate so we know when the keyboard's "Done" button is pressed
// Add an accessibility label that describes what the text field is for.
}
return testText;
}// custom keyboard 사용하기
- (UITextField *)test2Text
{
test2Text.inputView = customKeyboard;
}2. 내가 만든 키보드를 모달뷰로? 아니면 어떻게 끼워서 동작 시킬 것인가?
이미 위에서 UITextField를 클릭하면 keyboard대신에 UIView가 나오도록 작성을 했다. 거기에 버튼을 넣고 여러가지 작업을 해야 할듯...
고려해야 할 사항
1. backspace키의 역할을 구현, Done구현
3. UIKeyboardType
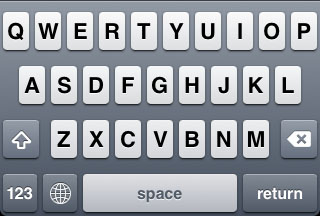
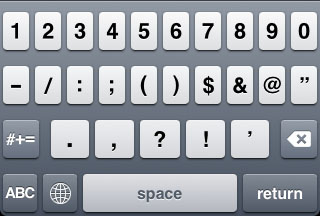
UIKeyboardTypeNumbersAndPunctuation
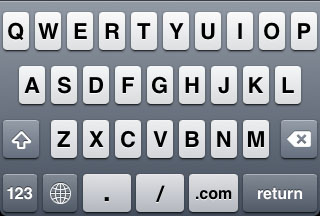
UIKeyboardTypeURL
UIKeyboardTypeNumberPad
UIKeyboardTypePhonePad
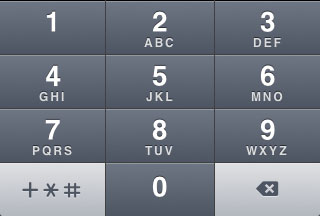
UIKeyboardTypeNamePhonePad
UIKeyboardTypeEmailAddress
posted by : http://gprince.yolasite.com/index/uikeyboardtype
| UIKeyboardTypeNumberPad and the missing "return" key |  |
 |
 |
| News - Development |
| Written by Luzian Scherrer |
| Tuesday, 21 April 2009 01:00 |
UPDATE 17 June 2010
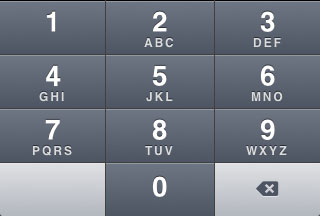
If you have ever written an iPhone app that requires numeric input, then you surely know about the UIKeyboardTypeNumberPad. And if you have ever used that flavor of the iPhone's keyboard, then you surely know that it lacks one very important feature: The UIKeyboardTypeNumberPad does not have a "return" key. In fact every other keyboard type (except for the pretty similar UIKeyboardTypePhonePad) does offer the possibility to be dismissed by setting the returnKeyType property of the corresponding UITextInputTraits implementor. So how does one achieve the same effect with the number pad? We have found a workround! When looking at the number pad, you'll notice that there is an unused space on its bottom left. That's where we are going to plug in our custom "return" key.
To make it short: take a screenshot, cut out the whole backspace key, flip it horizotally, clear its backspace symbol in Photoshop and overlay it with the text that we want on our “return” key. We’ve chosen to label it “DONE”. Now we have the image for our custom button’s UIControlStateNormal. Repeat the whole procedure (with a touched backspace key when taking the screenshot) to get a second image for our button’s UIControlStateHighlighted. Here’s the result:
Now back to coding. First we need to know when the number pad is going to be slided up on the screen so we can plug in our custom button before that happens. Luckily there’s a notification for exactly that purpose, and registering for it is as easy as: [[NSNotificationCenter defaultCenter] addObserver:self selector:@selector(keyboardWillShow:) name:UIKeyboardWillShowNotification object:nil]; Don't forget to remove the observer from the notification center in the appropriate place once you're done with the whole thing: [[NSNotificationCenter defaultCenter] removeObserver:self]; Now we’re getting to the heart of it. All we have to do in the keyboardWillShow method is to locate the keyboard view and add our button to it. The keyboard view is part of a second UIWindow of our application as others have already figured out (see this thread). So we take a reference to that window (it will be the second window in most cases, so objectAtIndex:1 in the code below is fine), traverse its view hierarchy until we find the keyboard and add the button to its lower left: - (void)keyboardWillShow:(NSNotification *)note { // create custom button UIButton *doneButton = [UIButton buttonWithType:UIButtonTypeCustom]; doneButton.frame = CGRectMake(0, 163, 106, 53); doneButton.adjustsImageWhenHighlighted = NO; [doneButton setImage:[UIImage imageNamed:@"DoneUp.png"] forState:UIControlStateNormal]; [doneButton setImage:[UIImage imageNamed:@"DoneDown.png"] forState:UIControlStateHighlighted]; [doneButton addTarget:self action:@selector(doneButton:) forControlEvents:UIControlEventTouchUpInside]; // locate keyboard view UIWindow* tempWindow = [[[UIApplication sharedApplication] windows] objectAtIndex:1]; UIView* keyboard; for(int i=0; i<[tempWindow.subviews count]; i++) { keyboard = [tempWindow.subviews objectAtIndex:i]; // keyboard view found; add the custom button to it if([[keyboard description] hasPrefix:@"<UIKeyboard"] == YES) [keyboard addSubview:doneButton]; } } Voilà, that’s it! The empty space for our button starts at coordinate (0, 163) and has the dimensions (106, 53). The doneButton method has to be written now of course, but that’s not hard any more. Just make sure that you call resignFirstResponder on the text field that is being edited to have the keyboard slide down.
We’re “DONE”. We have just discovered that the graphical design of the keyboard has slightly changed in the current iPhone OS 3.0 beta version. This means that the position and the image of our custom button will have to be adapted to that new style. The whole thing can be downloaded as Xcode project from us. |


'++++++++++ 관리 안 함 ++++++++++ > iOS' 카테고리의 다른 글
| 개발자 등록 완료 (1) | 2011.12.02 |
|---|---|
| iAD 광고 (1) | 2011.11.30 |
| 마직막 예제 (0) | 2011.09.21 |
| 단축 다이얼로 전화하고 문자 보내기 (0) | 2011.09.19 |
| mail 연동하기 (0) | 2011.09.19 |